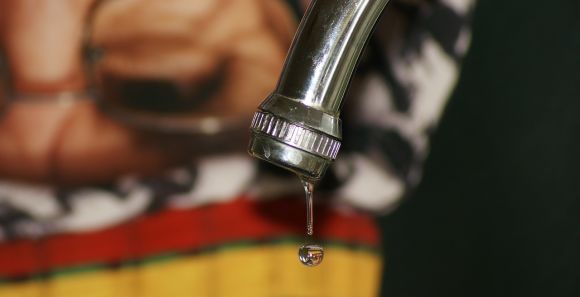
Is that constant dripping sound keeping you up at night? Are you tired of wasting water and money on a leaky faucet? Well, worry no more! In this article, we will guide you through the process of fixing a leaky faucet on your own. With a few simple steps and some basic tools, you’ll have your faucet working like new in no time.
Identifying the Type of Faucet
Before you begin the repair, it’s important to identify the type of faucet you have. There are four common types: compression, cartridge, ceramic disk, and ball. Each type requires a slightly different repair method, so knowing which one you have will save you time and frustration.
Gathering the Tools
Once you’ve identified the type of faucet, gather the necessary tools for the repair. You will typically need an adjustable wrench, a screwdriver, and replacement parts specific to your faucet type. These parts can be found at most hardware stores or online.
Shutting Off the Water
Before you start working on the faucet, make sure to shut off the water supply. Look for the shut-off valves under the sink and turn them clockwise until the water stops flowing. This will prevent any water from leaking while you’re making the repairs.
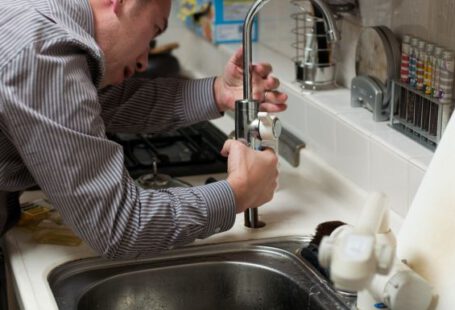
Disassembling the Faucet
Now it’s time to disassemble the faucet. Start by removing the decorative cap on the handle, if there is one. Underneath, you will find a screw that needs to be unscrewed using a screwdriver. Once the screw is removed, gently pull the handle off.
Next, use an adjustable wrench to remove the packing nut, which is located directly under the handle. Once the packing nut is removed, you should be able to lift off the entire faucet assembly.
Inspecting and Replacing Parts
With the faucet disassembled, take a close look at the components to identify the source of the leak. Common culprits include worn-out washers, O-rings, or cartridges. Replace any damaged or worn-out parts with new ones.
Reassembling the Faucet
After replacing the necessary parts, it’s time to reassemble the faucet. Start by placing the faucet assembly back into position and tightening the packing nut with an adjustable wrench. Then, reattach the handle by screwing it back in place with a screwdriver.
Testing the Repair
Once the faucet is reassembled, turn the water supply back on slowly and check for any leaks. If you notice any leaks, tighten the connections further or replace any faulty parts. It’s important to ensure that the faucet is working properly before considering the repair complete.
Maintaining Your Faucet
Now that your faucet is fixed, it’s important to maintain it to prevent future leaks. Regularly clean the faucet and check for any signs of wear or damage. If you notice any issues, address them promptly to avoid more significant problems down the line.
In conclusion, fixing a leaky faucet on your own is a simple and cost-effective solution. By identifying the type of faucet, gathering the necessary tools, and following the step-by-step process, you can easily repair the leak and save water and money in the process. Remember to shut off the water supply, inspect and replace any damaged parts, and test the repair before considering it complete. With a little effort and know-how, you can have your faucet working like new in no time.